Table of Contents
ToggleMost two-car garages end up as cluttered storage bins with cars squeezed between forgotten treadmills and holiday decorations. But a standard 20×20-foot or 24×24-foot garage offers roughly 400–576 square feet of potential, space that can be organized, finished, and designed to work as hard as any other room in the house. Whether the goal is a clean workshop, a gym corner, or simply a garage where finding the snow shovel doesn’t require an excavation, thoughtful interior design makes it happen. This guide covers flooring, lighting, storage systems, zoning strategies, and finishes that transform a concrete box into a functional, good-looking space.
Key Takeaways
- A 400–576 square foot two-car garage can be transformed through smart storage, flooring, lighting, and zoning strategies that maximize both functionality and appearance.
- Wall-mounted slatwall, pegboard, and overhead ceiling racks are essential storage solutions that keep tools and gear visible while freeing up floor space for vehicles and work zones.
- Epoxy or polyaspartic floor coatings significantly outperform bare concrete and cheap paint by resisting stains, chemicals, and abrasion while creating a durable, finished look.
- Layer your lighting with 50–75 lumens per square foot of general illumination, plus task lighting above workbenches and motion-sensor switches to improve safety and reduce eye strain.
- Create dedicated activity zones by mapping primary uses (parking, workshop, fitness, storage) on a floor plan and using physical dividers, tape, or color-coded systems to prevent cross-contamination and maintain organization.
- Budget-friendly DIY upgrades like epoxy floor stains ($150), simple plywood workbenches ($100), and pegboard installations ($75) deliver high-impact results over a single weekend.
Smart Storage Solutions for Maximum Space Efficiency
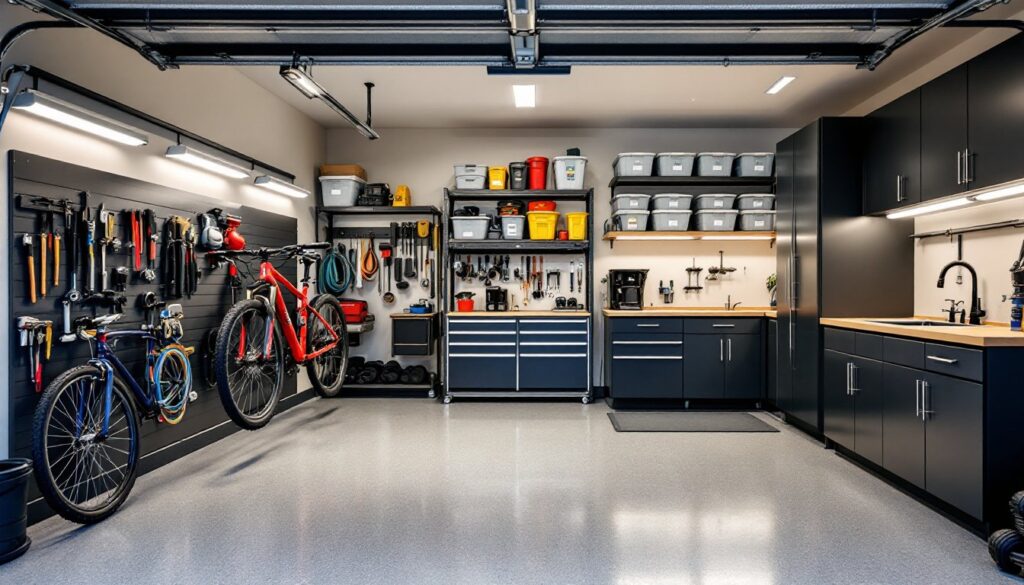
Wall-mounted systems are the backbone of garage storage. Slatwall panels, pegboard, or heavy-duty track systems (rated for 50+ lbs per linear foot) keep tools, bikes, and gear off the floor and visible. Install slatwall 4 feet high around the perimeter, anchoring into wall studs every 16 inches on center with 3-inch lag screws. This leaves the lower wall clear for workbenches or cabinets.
Overhead storage racks mounted to ceiling joists reclaim dead air space. Steel racks rated for 600 lbs work well for bins of seasonal items, but verify joist spacing (typically 16 or 24 inches on center) and use Grade 5 lag bolts, not drywall anchors. Keep at least 12 inches of clearance between the garage door track and any overhead rack.
Modular steel or plywood cabinets provide enclosed storage and a cleaner look than open shelving. Freestanding units (24 inches deep, 36 inches wide) don’t require wall mounting, making them renter-friendly. For a budget option, build plywood cabinets with ¾-inch birch ply and pocket-hole joinery, just seal or paint all surfaces to resist moisture.
Pro tip: Measure twice and account for car door swing. Leave at least 30 inches between a parked vehicle and any storage unit to avoid door dings.
Flooring Options That Combine Durability and Style
Bare concrete is porous, stains easily, and dusts constantly. Upgrading the floor is one of the highest-impact changes in a garage.
Epoxy coatings (two-part 100% solids epoxy, not water-based garage paint) bond chemically to clean, etched concrete and resist hot-tire pickup, chemicals, and abrasion. Coverage runs about 250–300 square feet per gallon at recommended thickness. Surface prep is critical: grind or acid-etch the slab, fill cracks with epoxy filler, and ensure the concrete is fully cured (at least 28 days old). Broadcast color flakes into wet epoxy for texture and a less clinical look. Application requires respirator, gloves, and good ventilation, epoxy fumes are no joke.
Interlocking floor tiles (rigid PVC or polypropylene) snap together without adhesive and can be pulled up if moving. Tiles with a diamond or coin pattern hide dirt better than smooth finishes. They’re easy to install but can shift under rolling toolboxes: perimeter edging helps. Homeowners exploring interior design ideas often appreciate the modular approach for quick transformations.
Polyaspartic coatings cure faster than epoxy (often same-day traffic), tolerate a wider temperature range during install, and offer better UV resistance. They cost more per square foot but suit climates with temperature swings.
Skip peel-and-stick vinyl or cheap garage-floor paint, they telegraph every imperfection and peel within a year under normal use.
Lighting Design to Brighten Your Garage Workspace
Garages typically come with a single porcelain socket and a 60-watt bulb, inadequate for detail work or safety. Target 50–75 lumens per square foot for general tasks, more for a workbench area.
LED shop lights (4-foot or 8-foot linkable fixtures, 4000–5000 lumen output each) mount directly to ceiling joists or hang on chain. Daisy-chaining multiple fixtures from one outlet simplifies wiring. Look for a 5000K color temperature (daylight white) to reduce eye strain and render colors accurately when painting or staining.
For serious workspace, add task lighting above the bench: a swing-arm LED clamp light or under-cabinet strips (24-inch, 1200+ lumen sections) eliminate shadows. Magnetic LED strips stick to metal toolboxes and move with the project.
Consider a motion-sensor switch for overhead lights or wire a few fixtures to a separate switch for quick checks without lighting the whole space. DIY home projects often emphasize layered lighting for both function and ambiance.
If running new circuits, follow NEC Article 210 for garage receptacle requirements (at least one 120V, 20-amp circuit, GFCI-protected). This may require a permit depending on jurisdiction. Not comfortable with electrical? Hire a licensed electrician, garage circuits often share the panel with high-draw tools.
Creating Dedicated Zones for Different Activities
A well-zoned garage prevents cross-contamination (saw dust in the gym corner) and keeps projects organized.
Start by mapping primary uses: parking, workbench/shop, sports gear, garden tools, overflow household storage, fitness area, or hobby station. Draw to scale on graph paper or use a simple floor-plan app. Account for vehicle dimensions (average sedan: 15 feet long, 6 feet wide: truck or SUV: up to 19 feet long, 7 feet wide) plus door clearance.
Define zones with physical dividers or visual cues. A rubber gym mat (⅜-inch to ½-inch thick interlocking tiles) marks the workout zone and protects flooring from dropped weights. A rolling workbench (30×60 inches on locking casters) can shift between zones or tuck against a wall. For those refining home decor design sensibilities, color-coded bins or tape on the floor work surprisingly well to keep zones distinct.
If the garage doubles as a workshop, position the workbench along a sidewall with ample access on three sides (ideal: 36 inches clearance). Place the miter saw station near the overhead door for long stock to extend outside during cuts. Tools like home design software can help visualize zone layouts before moving heavy equipment.
For multi-car households, establish a no-creep rule: tape or paint a line 6 inches from the back wall so drivers know when to stop. Hang a tennis ball on a string from the ceiling as a bumper guide.
Wall Treatment and Color Schemes That Work
Exposed drywall in a garage absorbs moisture, harbors mold, and tears easily. Finishing walls improves durability and appearance.
Paint is the simplest treatment. Prime bare drywall with a moisture-resistant primer (PVA or latex-based), then apply two coats of semi-gloss or satin latex paint in light colors (white, light gray, beige) to maximize light reflection. Semi-gloss cleans easier than flat and resists scuffs. One gallon covers roughly 350–400 square feet: a two-car garage typically needs 3–4 gallons for walls.
For high-impact zones, install ¾-inch plywood or OSB sheathing over studs (or directly onto drywall if studs aren’t accessible) as a backer for heavy hooks, slatwall, or pegboard. Paint or seal the plywood to prevent moisture absorption. Many interior home design enthusiasts extend this concept into garages for a cohesive look.
Wainscoting or beadboard panels (real wood or PVC) on the lower 4 feet of walls add texture and protect against dings from ladders or bikes. PVC beadboard doesn’t rot and installs with construction adhesive and finish nails.
Avoid bold accent walls unless the garage is climate-controlled and well-lit, dark colors absorb light and make a cold space feel colder. Stick to neutrals with pops of color via storage bins or tool organizers.
Insulation matters if the garage is used year-round. Adding R-13 fiberglass batts between studs and covering with drywall or OSB moderates temperature swings, reduces noise, and can lower heating costs if the garage shares a wall with conditioned space. Insulating the garage door (DIY kits with foil-faced foam panels) also helps.
Budget-Friendly DIY Upgrades You Can Start This Weekend
Not every improvement requires a contractor or a four-figure budget. These projects deliver visible results in one or two weekends.
Repaint the floor with a quality concrete stain or single-part epoxy garage paint ($40–70 per gallon). Clean and etch the slab with muriatic acid (wear gloves, goggles, respirator), then roll on two coats. It won’t last as long as true epoxy, but it transforms the space for under $150.
Build a simple workbench from a single sheet of ¾-inch plywood ($50–70), 2×4 framing ($30–40 for an 8-foot bench), and #8 wood screws. Cut the ply to 24×96 inches, frame a base 34–36 inches tall, and screw the top down. Add a power strip mounted to the front edge. Total cost: around $100. Platforms like Houzz offer endless design variations for custom bench builds.
Install pegboard along one wall. A 4×8-foot sheet of ¼-inch pegboard runs $20–30. Mount it with 1×2 furring strips behind (for hook clearance) and 2-inch screws into studs. Add a starter set of hooks ($15–25). Total outlay: under $75.
Organize with labeled bins and French cleats. Cut ¾-inch plywood into 3-inch-wide strips, rip a 45-degree bevel down the center, and screw one half to the wall (into studs), the other to bins, shelves, or tool holders. They interlock and reposition easily. Scrap plywood works fine: cost is mostly fasteners and time.
Improve ventilation by adding a box fan in a window opening or installing a through-wall exhaust fan ($50–120 at home centers). Proper airflow reduces fumes from paints, solvents, and gas engines. Check local code if cutting into exterior walls.
For those using a home design app to plan layouts, test ideas digitally before committing to lumber cuts or permanent installs.
Conclusion
A well-designed two-car garage isn’t about turning it into a showroom, it’s about making the space work efficiently and look decent while doing it. Start with one or two high-impact upgrades (flooring, lighting, or a wall storage system), then build from there as time and budget allow. The best garage is the one that suits how it’s actually used, whether that’s parking cars, building furniture, or finally having a spot for the lawn mower that doesn’t block the deep freeze.