Table of Contents
ToggleBuilding a home bar isn’t just about installing a counter and stocking shelves with liquor bottles. A well-designed bar becomes the centerpiece of your entertainment space, a spot where friends gather, conversations flow, and every detail contributes to the experience. Whether carving out a corner in the basement or dedicating an entire room, thoughtful bar interior design blends functionality with style. This guide walks through the essential elements, layout options, material choices, and design decisions that turn a simple bar setup into a space worth showing off.
Key Takeaways
- Bar interior design requires essential components including a 42-inch-high counter, appropriate seating, storage, sink, and GFCI-protected electrical outlets to function properly.
- Choose your bar layout—straight, L-shaped, U-shaped, island, or peninsula—based on available space and how the bar will serve your entertainment needs.
- Select durable countertop materials like quartz, granite, or sealed butcher block that withstand spills and condensation in high-use bar areas.
- Layer three types of lighting—ambient, task, and accent—with dimmers to create the perfect mood and functionality in your bar interior design.
- Plan comprehensive storage for bottles, glassware, tools, and refrigeration before building to avoid a cluttered, non-functional space.
- Always check local building codes, obtain necessary permits, and consider hiring professionals for plumbing, electrical, and structural work to ensure safety and code compliance.
Essential Elements of Bar Interior Design
Every functional home bar needs a core set of components. Skip one, and the space feels incomplete.
The bar counter forms the foundation. Standard commercial bar height sits at 42 inches from floor to countertop, with a 30-inch depth for the bartender side and a 16- to 24-inch overhang for seating. If space is tight, a narrower counter works, but guests need at least 24 inches of width per seat for elbow room.
Bar seating comes next. Stools should measure 28 to 30 inches high for standard counter height (36 inches) or 30 to 32 inches for full bar height. Choose between backless stools for a sleek look or backed options for longer sitting comfort. Leave 6 to 8 inches between the seat top and counter underside.
Storage and shelving separate a functional bar from a decorative one. Plan for bottle storage (upright wine, inverted liquor on speed rails), glassware (hanging racks or cabinets), and refrigeration (under-counter beverage cooler or mini-fridge). According to many interior design trends, open shelving with backlit displays creates visual impact, but closed cabinets hide clutter.
A sink with running water transforms convenience. A small 15- to 18-inch bar sink handles rinsing glasses and mixing drinks. It requires plumbing rough-in, either tapping into existing lines or installing new supply and drain runs. Check local codes: some jurisdictions require permits for new plumbing fixtures.
Electrical outlets are non-negotiable. Plan for blenders, ice makers, lighting, and chargers. The National Electrical Code (NEC) requires GFCI protection for receptacles near sinks. Install outlets every 4 feet along the counter, positioned 4 inches above the surface.
Choosing the Right Bar Layout for Your Space
Layout dictates flow and capacity. The wrong configuration turns a party hub into a bottleneck.
Straight bar (single-sided): The simplest layout, ideal for narrow spaces or basement walls. Guests sit on one side, bartender works from the other. Requires minimum 8 feet of length for three seats and 48 inches of clearance behind the bar for movement. Works well in dining room conversions where one wall is dedicated to entertaining.
L-shaped bar: Wraps two adjoining walls, adding corner space for prep or display. Increases seating without requiring a larger footprint. The corner often houses a sink or small refrigerator. Ensure the bartender can reach all zones without excessive movement, 30 to 36 inches of walking space inside the L keeps things efficient.
U-shaped bar: Encloses the bartender on three sides with seating all around. Best for dedicated bar rooms or large basements. Offers maximum seating and workspace but demands serious square footage, minimum 10 feet by 10 feet for a functional U. This layout works when the bar is the room’s focal point, not an add-on.
Island bar: Freestanding and accessible from all sides, popular in open-concept spaces. Requires 42 to 48 inches of clearance around the perimeter for traffic flow. Often includes lower shelving or cabinets on the non-seating sides for storage. This style suits rooms where the bar doubles as a divider between zones.
Peninsula bar: Extends from a wall like a dock, with seating on one or both long sides. Saves space compared to an island while still offering multi-directional access. A solid choice for finished basements where plumbing and electrical already exist along one wall.
Selecting Materials and Finishes That Make an Impact
Material choices define durability, maintenance, and aesthetic. A bar surface sees spills, condensation, and wear, choose accordingly.
Countertops and Bar Surfaces
Butcher block delivers warmth and classic bar appeal. Typically 1.5 to 2 inches thick, it’s relatively affordable and DIY-friendly to install. Seal it with food-safe mineral oil or polyurethane to resist moisture. Downside: requires periodic re-sealing and can stain if neglected.
Granite or quartz offer durability and stain resistance. Quartz is engineered, non-porous, and doesn’t require sealing. Granite is natural stone, needs sealing every 1-2 years, but offers unique patterns. Both cost $50 to $150 per square foot installed, depending on grade. They’re heavy, ensure your bar frame uses 2×4 studs on 16-inch centers or double up framing for support.
Concrete brings an industrial, custom-molded look. It can be stained, polished, or embedded with decorative elements. Concrete countertops typically run 1.5 to 2 inches thick and weigh around 18 to 20 pounds per square foot. Properly sealed, they resist stains, but they require professional mixing and curing or significant DIY skill.
Laminate or solid surface materials like Formica or Corian provide budget-friendly options. Laminate costs $10 to $40 per square foot, installs easily, and comes in endless patterns. It’s less heat- and scratch-resistant than stone but works well for light-use home bars. Solid surface is pricier but can be sanded to remove scratches.
Wood species for the bar face and frame: Oak, walnut, and maple are common choices for bar fronts and trim. Use 3/4-inch plywood sheathing over a stud frame, then apply veneer, tongue-and-groove boards, or reclaimed wood panels. Finish with satin polyurethane for protection. For a weathered look, consider barn wood or pallet wood (ensure it’s heat-treated, not chemically treated).
Backsplash and wall treatments: Subway tile, mosaic, or mirrored panels add visual interest behind the bar. Mirror expands the sense of space and reflects bottle displays. Tile is practical for splashes and easy to clean. For a modern edge, try metal panels, reclaimed brick, or shiplap. Many design and decor concepts emphasize textural contrast between smooth counters and rustic or industrial wall finishes.
Lighting Design: Setting the Perfect Ambiance
Lighting makes or breaks the mood. Too bright feels sterile: too dim, and nobody can see their drink.
Layer three types of lighting: ambient, task, and accent.
Ambient lighting provides overall illumination. Recessed ceiling cans on a dimmer switch give flexibility. Aim for 30 to 50 lumens per square foot in a bar area, enough to navigate safely but not glaring. Space recessed fixtures 4 to 6 feet apart and 24 to 30 inches from walls.
Task lighting illuminates work zones. Under-cabinet LED strips light the countertop for mixing drinks and reading labels. Install them toward the front edge of upper cabinets, shielded by a trim piece to avoid glare. Plug-in LED tape works for retrofits: hardwired runs look cleaner and comply with code if the bar is a permanent fixture. Many homeowners now integrate these accents with rendering software to visualize placement before installation.
Accent lighting highlights bottles, glassware, and architectural features. LED strip lights inside open shelving create a backlit glow. Small puck lights or track lighting draw attention to display areas. Consider color-changing RGB LED strips controlled by a remote or smart switch for adjustable mood, popular in modern home decor setups.
Pendant lights over the bar add style and focused light. Hang them 30 to 36 inches above the counter. For a row of pendants, space them 24 to 30 inches apart. Choose fixtures with exposed filament bulbs for industrial flair or drum shades for a softer look.
Dimmers and controls: Install dimmers on every lighting circuit. A bar used for daytime prep needs brighter light than evening cocktails. Smart dimmers with app control let you save preset scenes. Ensure dimmer switches are rated for LED loads if using LED bulbs, standard incandescent dimmers can cause flickering.
Color Schemes and Style Themes for Home Bars
Color and style set the bar’s personality. Match it to the rest of the home or carve out a distinct identity.
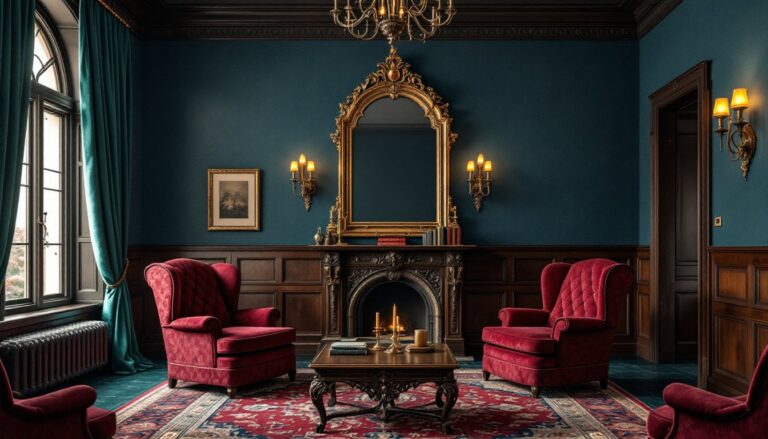
Dark and moody: Deep navy, charcoal, or espresso brown evoke a classic speakeasy vibe. Pair with brass fixtures, leather stools, and Edison bulb lighting. Walls in Sherwin-Williams Iron Ore or Benjamin Moore Hale Navy work well. This palette hides wear and creates intimacy. Add contrast with lighter wood tones or metallic accents. Discussions on home design forums often highlight this as a top choice for basement bars.
Industrial chic: Exposed brick, metal bar faces, concrete counters, and black steel shelving. Stick to a palette of grays, blacks, and raw wood. Pipe shelving and Edison pendants complete the look. This style suits lofts and modern spaces. It’s rugged but requires careful execution to avoid looking unfinished.
Mid-century modern: Clean lines, teak or walnut wood, and bold accent colors like mustard yellow or burnt orange. Keep cabinetry simple with flat-front doors and tapered legs on the bar frame. Stools with molded plastic seats or thin metal legs fit the era. Lighting might include globe pendants or sputnik chandeliers.
Rustic farmhouse: Reclaimed wood bar front, open shelving with metal brackets, and a butcher block or distressed wood counter. Colors lean neutral, white, cream, sage green, or barn red. Vintage signage and mason jar lights add charm. This style pairs well with shiplap walls and barn door hardware.
Coastal or nautical: White or light blue walls, rope accents, weathered wood, and glass tile backsplash in aqua or seafoam. Bar stools might feature woven rattan or driftwood finishes. Keep it light and airy, this theme works in spaces with natural light. Insights from architectural showcases suggest combining shiplap with nautical hardware for authenticity.
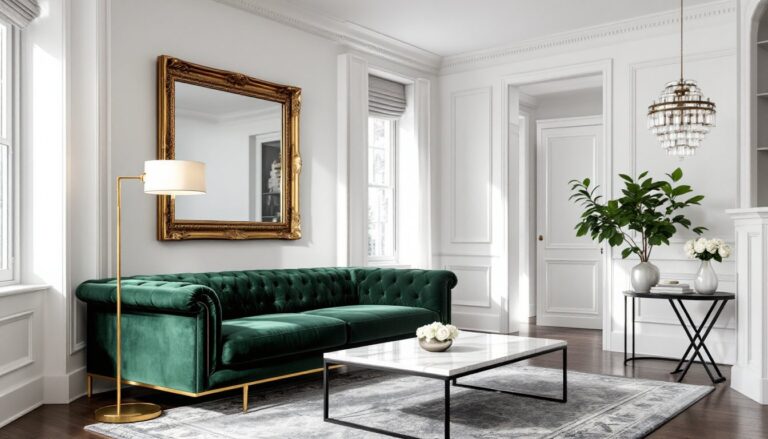
Bold and contemporary: High-gloss lacquered cabinets, LED strip lighting, and statement colors like emerald green, cobalt blue, or matte black. Pair with quartz or glass countertops and minimalist hardware. This style suits open-concept homes where the bar is a visual anchor.
Storage Solutions and Functional Design Features
A bar that looks great but lacks storage frustrates fast. Plan for bottles, glassware, tools, and accessories.
Bottle storage: Standard liquor bottles are 12 inches tall: wine bottles 11 to 13 inches. Upper shelves should be 12 to 14 inches high. For display, use floating shelves or open units with glass or mirrored backs. For hidden storage, install base cabinets with adjustable shelves to fit bottle heights. A built-in wine rack holds bottles horizontally: slots are typically 3.5 to 4 inches in diameter.
Glassware organization: Hanging racks under upper shelves hold stemware inverted. Each glass needs 3 to 4 inches of space. For tumblers and rocks glasses, dedicate cabinet shelves or use drawer inserts with foam dividers to prevent clinking. Standard bar glass heights range from 4 to 8 inches: plan shelf spacing accordingly.
Tool and accessory storage: Jiggers, shakers, strainers, muddlers, and bottle openers clutter fast. Use drawer organizers or wall-mounted magnetic strips. A utensil caddy on the counter keeps frequently used tools within reach. Mount a paper towel holder inside a cabinet door or on the bar end.
Refrigeration: Under-counter beverage coolers fit a 24-inch cabinet opening and hold 100 to 150 cans. Built-in units require ventilation, front-venting models allow flush installation, while rear-venting need clearance. If installing a mini-fridge, ensure it’s rated for built-in use or leave space for airflow. Add an ice maker if budget and plumbing allow: portable countertop models are an alternative.
Hidden features: A pull-out trash drawer or tip-out bin keeps the bar tidy. A cutting board that slides over the sink provides prep space. Install a toe-kick drawer at the base for storing linens or bar mats, this uses otherwise wasted space.
Electrical and tech integration: Add USB charging ports in the bar face for guest convenience. If the bar includes a TV, plan cable management with in-wall conduit or raceways. A small speaker system (in-ceiling or under-cabinet Bluetooth) enhances the atmosphere.
Safety and code considerations: If structural changes are involved, removing walls, adding plumbing, or significant electrical work, check local building codes and permit requirements. Some jurisdictions require licensed professionals for gas line work (if installing a gas fireplace or outdoor bar element) or major electrical additions. Even if a permit isn’t required, following International Residential Code (IRC) guidelines ensures safety.
Material acclimation matters for wood components. Let lumber and cabinetry sit in the installation space for 48 to 72 hours before building to prevent warping or gaps as wood adjusts to humidity.
Personal protective equipment (PPE): When cutting, sanding, or finishing materials, wear safety goggles, a dust mask or respirator (especially with MDF or treated lumber), and hearing protection if using power saws. Gloves protect hands during finish application and heavy lifting.
For projects involving tile, concrete, or custom countertops, consider hiring a pro. These require specialized tools and skill to avoid costly mistakes. Electrical work beyond simple outlet installation should involve a licensed electrician, particularly if adding circuits or upgrading panels.