Table of Contents
ToggleWalls aren’t just vertical dividers, they’re the canvas for every room in your home. A well-designed wall can anchor a space, hide structural quirks, or turn a builder-grade box into something memorable. Whether you’re tackling a weekend refresh or planning a full-scale remodel, understanding wall treatments, finishes, and color theory will save you time, money, and buyer’s remorse. This guide walks through styles, techniques, materials, and budget hacks to help homeowners and DIY enthusiasts make smart decisions before the first paint roller hits drywall.
Key Takeaways
- Home interior wall design serves as the largest visual canvas in any room and directly affects the perception of furnishings, room acoustics, and moisture resistance.
- Popular wall design styles range from minimalist modern treatments with smooth finishes and neutral palettes to rustic textures like shiplap, board-and-batten, and reclaimed wood that add warmth and character.
- DIY wall design techniques such as accent walls, stenciling, peel-and-stick wallpaper, and paneling offer high-impact transformations at a fraction of professional costs.
- Paint sheen selection matters: flat finishes hide imperfections in low-traffic areas, while satin and semi-gloss sheens provide durability for high-traffic spaces and wet areas.
- Proper prep work—including wall cleaning, repairing damage, sanding, and priming—is the foundation of professional-looking wall finishes and prevents costly DIY failures.
- Budget-friendly wall makeover options include fresh paint ($0.50–$1.50 per square foot DIY), half-wall treatments, single accent walls, and shopping sales or mis-tinted paint to maximize your investment.
Why Your Wall Design Matters More Than You Think
Walls occupy the largest visual real estate in any room. Get them wrong, and even high-end furniture looks off. Get them right, and budget pieces feel elevated.
From a practical standpoint, wall finishes affect acoustics, moisture resistance, and durability. A glossy paint in a high-traffic hallway shows every scuff. Flat paint in a bathroom invites mildew. Textured finishes can mask imperfect drywall, or trap dust if you pick the wrong profile.
Wall design also dictates workflow for other trades. If you’re planning to hang cabinetry, mount a TV, or install chair rail, those decisions inform stud placement, blocking, and finish sequencing. Skipping this step means patching, repainting, or worse, cutting into a finished wall because you forgot to add backing.
Safety note: Any work involving load-bearing walls, electrical, or plumbing penetrations may require permits. Check local building codes before opening walls or adding heavy fixtures. If you’re unsure whether a wall is structural, consult a licensed contractor or structural engineer.
Popular Interior Wall Design Styles to Consider
Minimalist and Modern Wall Treatments
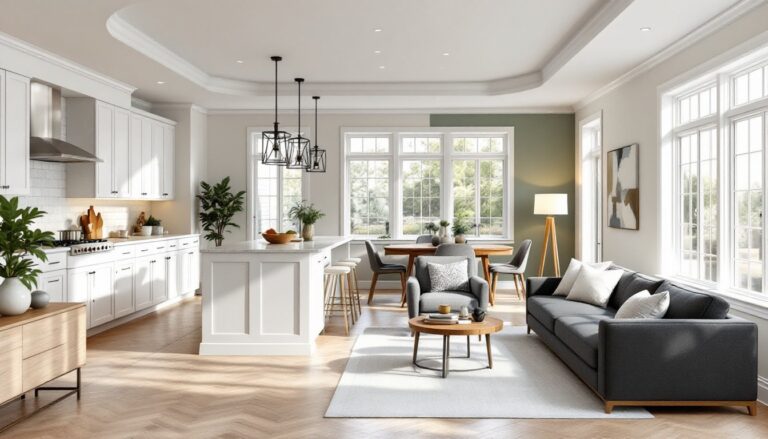
Minimalist walls prioritize clean lines, neutral palettes, and subtle texture. Think large-format drywall with a level 5 finish (the smoothest you can get), painted in whites, grays, or warm beiges. This approach works well in open-concept homes where walls recede and let furniture, art, or views take center stage.
Common techniques include color blocking, painting one wall or a geometric section in a contrasting shade, and using ultra-matte or eggshell sheens to reduce glare. Some homeowners opt for minimalist design principles that extend to every surface, including ceilings and trim.
Material options: Smooth drywall (1/2″ or 5/8″ for soundproofing), Venetian plaster (troweled thin for a polished look), or large-format wall panels (MDF or PVC for seamless joints). Avoid heavy crown molding or busy wainscoting, it fights the aesthetic.
Tools: Drywall trowel, orbital sander (220-grit for final pass), high-quality brush and roller (microfiber covers reduce texture), painter’s tape.
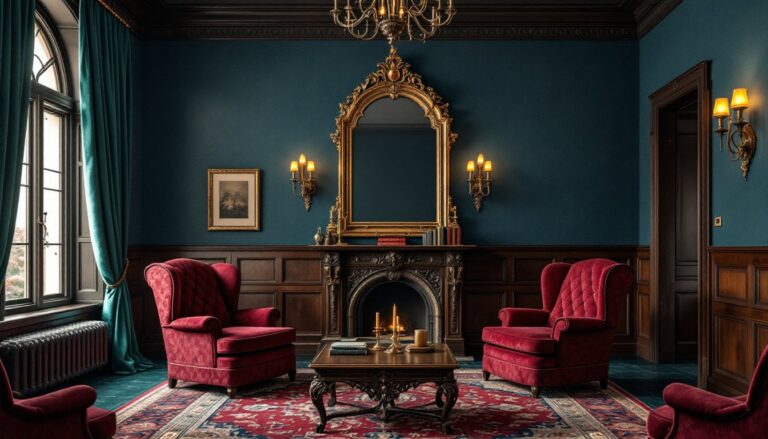
Rustic and Textured Wall Finishes
Rustic walls lean into imperfection: reclaimed wood planks, exposed brick, board-and-batten, or skip-trowel plaster. These finishes add warmth and character, especially in farmhouse, cottage, or industrial interiors. Designers on Homedit frequently showcase shiplap and barn wood accent walls for their tactile appeal.
Board-and-batten uses 1×2 or 1×3 furring strips spaced vertically over drywall, then painted. It’s a straightforward DIY project that adds dimension without major demo. Reclaimed wood planking is trickier, boards must acclimate to indoor humidity for at least 48 hours to prevent warping, and you’ll need a nail gun or construction adhesive rated for wall application.
Brick and stone: Real brick adds serious weight (plan for 40–50 lbs per square foot for a 4″ wythe). Most DIYers use thin brick veneer or faux panels. If going real, consult a structural engineer for load-bearing considerations.
Texture techniques: Skip trowel (joint compound applied and partially smoothed), knockdown (sprayed texture knocked flat with a trowel), or limewash (breathable, matte finish over plaster or brick).
PPE: Dust mask (N95 or better for sanding), safety glasses, work gloves. Always ventilate when working with adhesives or sealers.
Creative DIY Wall Design Techniques You Can Try
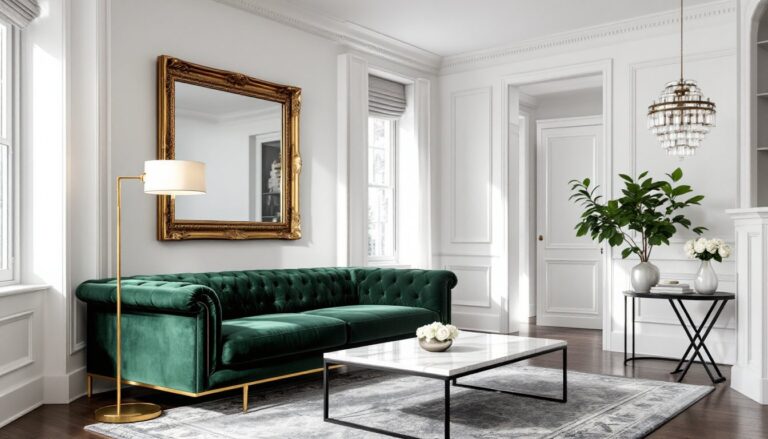
Accent Walls: The easiest high-impact project. Choose one wall per room, typically the one you see first when entering. Paint, wallpaper, or install a contrasting material (wood, tile, fabric panels). Keep the other three walls neutral to avoid visual chaos.
Stenciling and Hand-Painting: Low-cost, high-customization. Use painter’s tape and a stencil brush (short, stiff bristles) to apply patterns. For geometric designs, a laser level keeps lines straight. Chalk paint works well for matte, vintage looks but requires a topcoat (wax or poly) in high-touch areas.
Peel-and-Stick Wallpaper: Removable, renter-friendly, and no paste mess. Quality varies, cheap vinyl peels at the edges: better options use a fabric backing. Surface prep is critical: clean walls with TSP, let dry fully, and avoid textured drywall (it telegraphs through).
Paneling: Beyond the ’70s basement aesthetic, modern paneling includes tongue-and-groove pine, MDF fluted panels, or 3D geometric tiles. Install over furring strips for a flat plane, and finish with trim at inside and outside corners. A miter saw gives cleaner angle cuts than a circular saw, especially for baseboard and crown.
Wall Murals: Paint-by-number kits or projected stencils make this accessible. For photorealistic work, hire a muralist, this isn’t a beginner technique. Expect to pay $25–$75 per square foot for custom work, depending on detail and region.
Tile Accent: Subway, zellige, or geometric tiles can run floor-to-ceiling or just behind a vanity or bed. Wet areas require cement backer board and waterproof membrane. Thinset mortar and grout need 24–48 hours to cure: don’t rush it.
Safety reminder: Wear a respirator when cutting tile (silica dust), and ventilate well when using contact cement or solvent-based adhesives.
Choosing the Right Colors and Materials for Your Walls
Color Psychology and Light: Cool tones (blues, greens, grays) recede and calm: warm tones (reds, oranges, yellows) advance and energize. North-facing rooms get cooler, indirect light, warm whites and beiges prevent them from feeling clinical. South-facing rooms can handle cooler palettes without looking sterile.
Test paint with sample pots on poster board, not directly on walls. Move boards around the room throughout the day to see how natural and artificial light shift the color. What looks like a soft gray at noon may read lavender at dusk.
Sheen Selection:
- Flat/Matte: Hides imperfections, low reflectivity. Harder to clean, reserve for low-traffic areas (adult bedrooms, ceilings).
- Eggshell: Slight sheen, washable, forgiving. Good all-purpose choice for living rooms and dining rooms.
- Satin: More sheen, easier to scrub. Ideal for hallways, kids’ rooms, trim.
- Semi-Gloss/Gloss: Durable, moisture-resistant. Use in bathrooms, kitchens, and on trim. Shows every drywall flaw.
Paint Coverage: One gallon covers roughly 350–400 square feet with one coat on smooth drywall. Textured walls, dark colors, and porous surfaces need more. Budget for two coats minimum.
Material Considerations:
- Drywall: Standard 1/2″ for walls, 5/8″ for ceilings or soundproofing. Greenboard for moisture-prone areas, purple board for better mold resistance.
- Plaster: Old-school, durable, and repairable. Lime or gypsum-based. Requires skilled tradespeople, not a typical DIY job.
- Wood Paneling: Real wood expands and contracts with humidity. Install with finishing nails and construction adhesive, leaving 1/8″ expansion gaps at floor and ceiling. Seal or paint to prevent moisture uptake.
- Wallpaper: Vinyl (wipeable, good for kitchens), grasscloth (natural texture, fragile), or non-woven (easiest to install and remove). Homes on Home Bunch often pair grasscloth with board-and-batten for a layered, tactile look.
Primer Matters: High-hide primers (like Zinsser or Kilz) block stains, seal porous surfaces, and improve topcoat adhesion. Tinted primer cuts the number of finish coats needed when making a drastic color change.
Budget-Friendly Wall Makeover Tips for Every Room
Paint First: A fresh coat of paint is the cheapest transformation. DIY cost: $0.50–$1.50 per square foot including primer, paint, and supplies. Hiring a painter runs $2–$6 per square foot, depending on prep work and region.
Use What’s There: Instead of demoing old paneling, paint it. Sand lightly (120-grit), prime with a bonding primer, and topcoat. Same with dated tile, specialty tile paint (epoxy-based) can refresh a backsplash or bathroom for under $100.
Half-Wall Treatments: Board-and-batten, beadboard, or picture frame molding on the lower half of a wall costs less than full-height and still delivers visual interest. Paint the upper portion a lighter shade to keep ceilings feeling tall.
Wallpaper One Wall: A single accent wall with peel-and-stick or traditional wallpaper keeps material costs low (around $30–$80 per roll, covering roughly 28 sq ft). You’ll need a smoothing tool, utility knife, and level.
Thrift and Salvage: Reclaimed wood, vintage tiles, and architectural salvage yards offer character at a fraction of new-material cost. Inspect for lead paint (pre-1978 homes) and structural soundness. Clean and seal before installation.
DIY Texture: Skip pricey Venetian plaster and try a DIY knockdown or skip-trowel finish with joint compound ($15 for a 5-gallon bucket). Apply with a trowel, let it set up slightly, then smooth or knock down high spots. Paint over once dry.
Shop Sales and Mis-Tints: Paint stores discount mis-tinted colors and discontinued lines. If you’re flexible on exact shade, you can score premium paint for $10–$20 per gallon. Galleries featured on House Beautiful often highlight unexpected color wins that started as happy accidents.
Stretch Your Budget:
- Materials: Buy in bulk. A case of paint or a full box of tile often comes with a 10–15% discount.
- Labor: Trade labor with friends or family. You help with their deck: they help you hang drywall.
- Timing: Contractors are slower in winter (depending on region). Negotiate better rates during off-peak seasons.
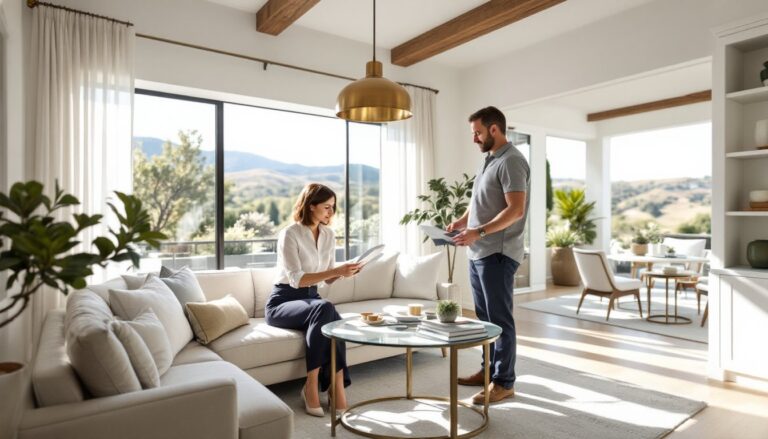
When to Call a Pro: Structural changes (removing or adding walls), electrical (adding outlets or switches behind new finishes), and large-scale plaster work are best left to licensed professionals. Permits, inspections, and liability matter. For broader home decor strategies that complement wall work, consider the whole-room approach before committing to one element.
Final Word on Prep: Most DIY fails trace back to skipped prep. Clean walls (TSP or degreaser), repair holes and cracks (spackle or joint compound), sand smooth (120–220 grit), prime, then paint. Rushing this step costs you in finish quality and long-term durability. Measure twice, cut once, and don’t skip the drop cloths.