Table of Contents
ToggleAn interior design remodel isn’t just about swapping paint colors or buying new throw pillows. It’s a deliberate, sometimes gutsy overhaul of how a space looks, feels, and functions, whether you’re reconfiguring a cramped kitchen, opening up a dated living room, or finally converting that basement into usable square footage. Done right, a remodel can add thousands in resale value, improve daily comfort, and make a house feel like it’s actually yours. But it’s also where homeowners burn through budgets, miss permit deadlines, and end up with mismatched finishes that seemed brilliant on Pinterest. This guide walks through the nuts and bolts, from planning and budgeting to choosing materials and knowing when to call in a pro.
Key Takeaways
- An interior design remodel combines cosmetic updates with structural changes to boost resale value by 50–80%, with kitchens and bathrooms delivering the strongest returns.
- Plan your interior design remodel with a detailed scope document, scaled floor plan, and permit research before starting any work to avoid costly mistakes and code violations.
- Budget $5–$15 per square foot for cosmetic refreshes, $50–$100 for mid-range remodels, and $150–$250+ for high-end projects, always adding a 20% contingency for surprises.
- DIY tasks like painting, trim installation, and click-lock flooring save money, but structural work, electrical systems, plumbing, and gas lines require licensed professionals to ensure safety and code compliance.
- Common remodel pitfalls—skipping prep work, ignoring load-bearing walls, undersizing electrical, and poor ventilation—can undermine your investment; focus on finishing details for a polished, professional result.
What Is an Interior Design Remodel and Why It Matters
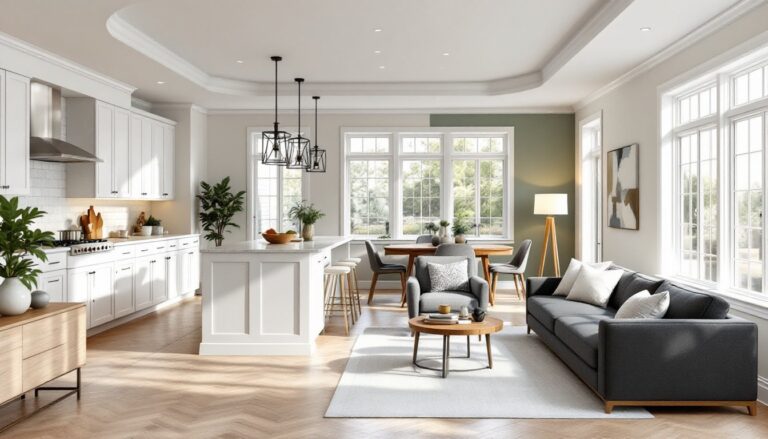
An interior design remodel combines cosmetic updates with structural or functional changes to transform how a space works and looks. It’s broader than redecoration (new curtains, furniture, art) and often involves some level of demolition, reconfiguration, or systems work, think removing a non-load-bearing wall, relocating plumbing for a new bathroom layout, or adding recessed lighting on a new circuit.
Why it matters: homes built even a decade ago often lack open floor plans, adequate storage, or the natural light today’s buyers expect. A thoughtful remodel addresses those gaps. It can also future-proof a space, wider doorways for aging in place, universal-design bathroom fixtures, or wiring for smart-home devices.
From a financial standpoint, strategic interior updates typically return 50–80% of cost at resale, with kitchens and bathrooms leading the pack. But value isn’t just monetary: improved lighting, better traffic flow, and finishes you actually like make daily life more enjoyable. Just be clear on scope, cosmetic changes (paint, flooring, fixtures) rarely require permits, but anything touching structure, electrical, or plumbing usually does. Check local building codes before you swing a hammer.
Planning Your Interior Design Remodel: Essential Steps Before You Start
Start with a scope document, a one-page list of every task, room, and trade involved. Write it all down: demo, framing, electrical, plumbing, drywall, paint, flooring, trim, fixtures. This keeps you honest about what’s realistic and helps when getting bids from contractors.
Next, measure twice (literally). Sketch the existing layout to scale on graph paper or use a free tool like SketchUp. Mark door swings, window heights, and any load-bearing walls (consult a structural engineer if you’re unsure, removing the wrong wall can collapse a ceiling). Identify where utilities run: HVAC ducts in soffits, plumbing stacks in walls, electrical panels. Relocating these costs serious money.
Research permit requirements early. Most jurisdictions require permits for structural changes, new circuits, gas line work, and plumbing alterations. Permit fees are typically $100–$500, but the inspection process catches code violations that could haunt you at resale or, worse, cause a safety issue.
Finally, create a punch list with priorities. Rank tasks as must-have (structural repairs, code compliance), should-have (new lighting, better storage), and nice-to-have (accent walls, decorative tile). This list becomes your budget triage tool when costs inevitably creep up.
Setting a Realistic Budget and Timeline
Budget: A basic cosmetic refresh (paint, new fixtures, maybe luxury vinyl plank flooring) runs $5–$15 per square foot. Mid-range remodels with some reconfiguration, new cabinetry, and updated systems land around $50–$100 per square foot. High-end projects, custom millwork, stone counters, designer tile, all-new MEP (mechanical, electrical, plumbing), can hit $150–$250+ per square foot. Always add a 20% contingency for surprises: rotted subfloor, knob-and-tube wiring, or that “small” plumbing fix that requires opening three walls.
Material costs fluctuate. Lumber, drywall, and copper piping all spiked post-2020: check current pricing rather than relying on old estimates. Labor often eats 40–60% of total budget, more in high-cost-of-labor metro areas.
Timeline: Cosmetic updates take 2–4 weeks if you’re DIYing evenings and weekends. A single-room remodel (kitchen, bath) with a licensed contractor typically takes 6–10 weeks, assuming no permit delays or back-ordered materials. Whole-home remodels can stretch 3–6 months. Build in buffer time, inspections, material lead times, and the inevitable “we found something in the wall” day will happen.
Top Interior Design Remodel Ideas for Every Room
Kitchen: Open the space by removing upper cabinets on one wall and adding open shelving or a window. Replace dated soffits with cabinets that go to the ceiling, 31⁄2 more feet of storage and a cleaner line. Swap laminate counters for quartz (non-porous, low-maintenance) or butcher block (budget-friendly, but needs sealing). If the layout works, skip the costly plumbing relocations and invest in better appliances, a tile backsplash, and under-cabinet LED strips on a dimmer.
Bathroom: Upgrade to a curbless shower with a linear drain for accessibility and a spa feel. Use large-format porcelain tile (12×24 or bigger) on walls and floor to minimize grout lines and make the space feel larger. Replace a standard vanity with a wall-mounted floating unit to expose more floor. Add a GFCI-protected outlet inside a drawer for electric toothbrushes and shavers, meets NEC code and declutters the counter.
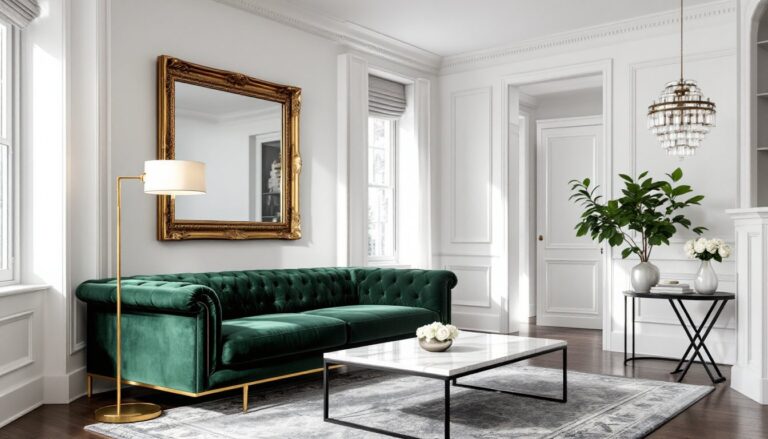
Living room: Paint the ceiling a shade lighter than walls to lift the space optically. Install picture-rail molding if your home’s era supports it, or add simple shiplap or board-and-batten for texture without the farmhouse cliché. Recessed lighting on dimmers (opt for IC-rated housings if insulation is present) provides ambient light: add a few strategically placed outlets for lamps to layer light.
Bedroom: Built-in closet systems (wire or melamine for budget, solid wood for high-end) double usable space. Paint the room in mid-tone neutrals that work morning and night, grays, warm taupes, soft greens. Consider a fresh approach to home decor elements like texture, pattern, and lighting layers to make the space feel intentional without a gut remodel.
Basement: Address moisture first, install a sump pump if groundwater is an issue, seal foundation cracks, and use mold-resistant drywall and rigid foam insulation on exterior walls. Frame walls with pressure-treated bottom plates on concrete. Use luxury vinyl plank (LVP) or engineered hardwood rated for below-grade: never solid hardwood. Add egress windows if turning the space into a legal bedroom, required by IRC for fire safety.
Choosing the Right Materials, Colors, and Finishes
Flooring: For high-traffic areas, porcelain tile or LVP outlasts laminate and real hardwood. If you want wood, engineered hardwood (real wood veneer over plywood core) handles humidity swings better than solid. Always acclimate flooring to the room for 48–72 hours before install, skip this and you’ll see gaps or buckling within months.
Paint: Use primer on fresh drywall, patches, or drastic color changes, it seals, improves adhesion, and reduces topcoat needs. For walls, satin or eggshell finishes hide imperfections better than flat and clean easier. Semi-gloss works for trim, doors, and high-moisture areas like baths. One gallon covers roughly 350–400 square feet: buy extra for touch-ups and compare batch numbers to avoid slight tint differences.
Cabinetry: Stock cabinets (Home Depot, Lowe’s) are budget-friendly but limited in size increments. Semi-custom (ordered through a dealer) offers more flexibility in dimensions, door styles, and interior fittings. Custom builds exactly what you need but costs 2–3× more. For a fresh look without replacing boxes, paint existing cabinets with a bonding primer (like Zinsser BIN or KILZ Adhesion) and a durable topcoat, DTM (direct-to-metal) alkyd or acrylic enamel both work.
Color: Neutrals remain resale-safe, warm whites (with a hint of beige or gray), soft grays, greiges. Save bold color for accent walls or easily changed elements like bedding and art. Test paint samples on at least two walls to see how natural and artificial light shifts the hue through the day. Browsing platforms like Houzz can help refine your color palette by seeing real-world applications across different lighting conditions.
Hardware and fixtures: Matte black, brushed nickel, and aged brass are current favorites. Match finish families within a room (all warm metals or all cool) for cohesion. For faucets and showerheads, look for WaterSense certification, uses 20% less water without sacrificing pressure.
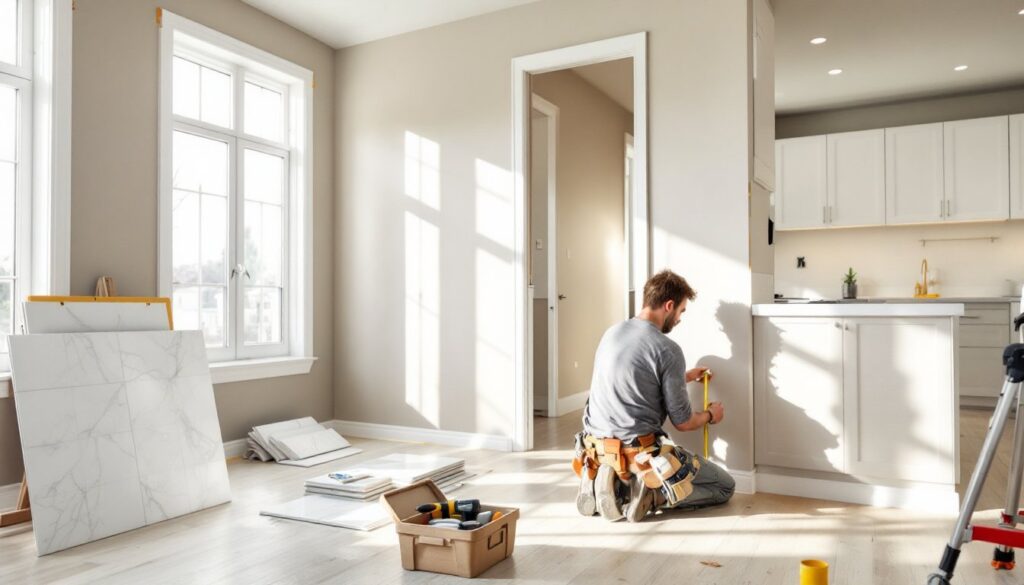
DIY vs. Hiring a Professional: Making the Right Choice
DIY-friendly tasks: Painting, installing trim or crown molding, laying LVP click-lock flooring, replacing light fixtures (on existing boxes), building simple shelving, tiling a small backsplash. These require common tools, miter saw for clean cuts (a circular saw works but leaves rougher edges), drill/driver, level, tape measure, caulk gun. Wear safety glasses for any cutting or demolition, and a respirator for sanding or working with solvent-based products.
Where to call a pro: Anything structural (moving/removing walls), electrical beyond swapping fixtures (new circuits, panel upgrades), plumbing relocations, HVAC ductwork, and permitted work that requires inspections. Even confident DIYers often hire out drywall finishing, it’s a learned skill, and bad mud/tape work shows through any paint.
Gas line work and major electrical should always go to licensed tradespeople. A mistake can mean a fire, gas leak, or failed inspection that forces you to rip out finished work. If the project feels over your head or the risk outweighs the savings, get three quotes from licensed, insured contractors and check recent references.
You can also hybrid it: hire a contractor for rough-in (framing, electrical, plumbing) and finish the cosmetic layers yourself. That keeps the critical, code-dependent work in expert hands while you control the budget on paint, flooring, and trim. For design inspiration and material guidance, resources like Remodelista and Freshome offer curated project galleries and product recommendations that help bridge the gap between concept and execution.
Common Mistakes to Avoid During Your Remodel
Skipping prep work: Painting over greasy kitchen walls or laying tile on an unlevel subfloor guarantees failure. Clean, sand, prime. Check floor flatness with a 4-foot level: tile and LVP both require substrates flat to within 3⁄16″ over 10 feet. Use self-leveling compound if necessary.
Ignoring load-bearing walls: Not every wall is safe to remove. Load-bearing walls carry weight from above, roof, upper floors. Removing one without a properly sized beam and posts can cause sagging, cracking, or collapse. Hire a structural engineer ($300–$600 for a stamped plan) before touching anything that runs perpendicular to floor joists or sits under a ridge beam.
Buying materials before finalizing design: You found a deal on tile, great. But will it work with the grout joint layout, the trim style, the lighting? Order samples first. Live with them in the space for a few days. For projects exploring minimalist interior design, restraint in material selection is especially critical to avoid visual clutter.
Undersizing electrical and plumbing: Adding one outlet or light seems minor, but circuits have limits, typically 15 or 20 amps. Overload a circuit and you’ll trip breakers constantly or, worse, overheat wiring. For kitchens, add dedicated 20-amp circuits for microwaves and small appliances. Same for bathrooms, don’t run a hair dryer and space heater on the same circuit.
Forgetting ventilation: Bathrooms need exhaust fans rated for the room’s cubic footage (CFM = room volume ÷ 7.5 for an 8-foot ceiling). Kitchens need range hoods vented to the outside, not recirculating filters. Poor ventilation traps moisture, leading to mold, peeling paint, and wood rot.
Rushing the finish: You’re tired, over budget, ready to be done. Don’t skip final caulking, touch-up paint, or that last coat of poly. Sloppy edges and gaps scream “DIY” in the bad way. Take the extra afternoon. It’s the difference between “we remodeled” and “wow, who did your remodel?”
For a deeper jump into cohesive design and material choices, combining the technical execution with aesthetic vision ensures the finished space feels both professional and personal.